Anchors are essential in technical canyons to descend the canyon. These can be ‘natural’ anchors using trees or rock in and around the canyon. Or they can be bolts fixed into the bedrock walls.
The NZ Canyoning Association Bolting Code of Practice is a great resource that discusses many of the issues around bolts and anchors in canyons.
Inspect before use!
A good anchor is plenty strong enough to cope with the forces of absieling. However, there are plenty of ways anchors can be bad, or degrade over time.
That’s another way of saying, it is your responsibility to inspect each anchor every time before you use it.
Bolts are difficult to properly inspect, and can be mistakenly trusted by the inexperienced even if they are not safe. Some questions to ask are:
Is the nut tight? Is the hanger properly aligned? Is there excessive corrosion? Does the bolt move? Are there cracks in the surrounding rock? Is the stud protruding more than a few threads above the nut?
This inspection only takes seconds by an experienced canyoner. Learn from experts on what to look for and what to do if something isn’t right…
Community maintenance
We all have a part to play in maintaining the anchors in the canyons we love. No matter what your skill level, there are ways to contribute to maintaining the resource for everyone to enjoy.
- Replace suspect webbing during your descent. Take the old stuff to the rubbish bin.
- Report the condition of anchors, using a trip report on this site. This helps others bring the right gear for replacement and maintenance.
- Join the NZCA. All membership fees contribute towards anchor installation, maintenance and upgrades.
- Become an apprentice. Learn from experienced canyoners, so you develop the skills to repair & replace bolted anchors.
Replacing webbing on bolts
Webbing degrades over time and needs replacement. If it is known that a canyon has webbing linked anchors, then bring a stash of webbing and replace old, faded, damaged or suspect webbing as you go.
The NZCA Bolting Code of Practise discusses this in detail. The key points are to understand the configuration of the bolts, and ensure replacement meets the technical standards of strength and style.
For in-line configuration anchors
Webbing should be tied between the upper hanger and the lower ring. When tying the knot, tie it as tightly as possible, pulling the ring upwards (ie, away from the final loaded position). That way, when you load the ring, the webbing pulls on both hangers, sharing the load more equally between the two bolts.
Ensure the tail of the not is used as padding for the upper hanger. This step is important: testing by Grant Prattley from OTE Rescue shows padding gives 15kN in 16mm webbing. Without padding, the webbing can fail at 8kN!
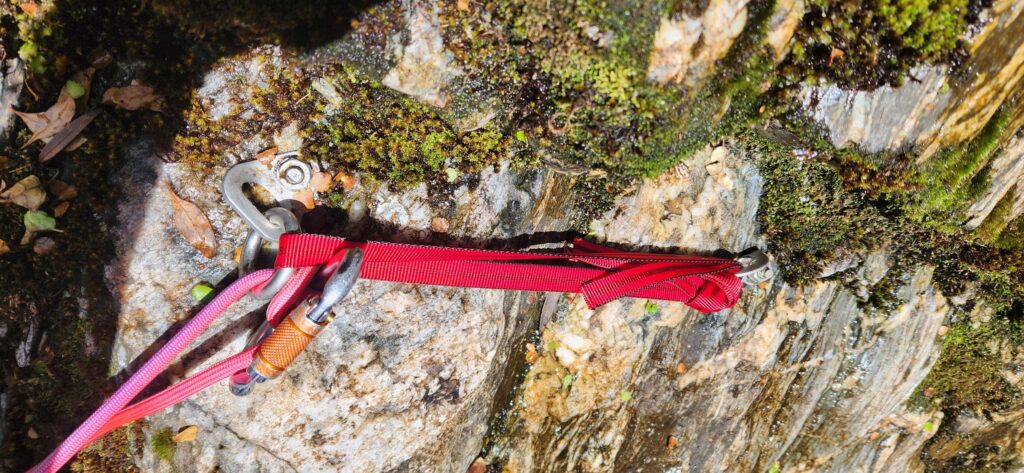
Here is an example of well-tied webbing on an inline anchor

Why is it good? Webbing through the ring, webbing is tight, knot tail is padding the upper (right) hanger.
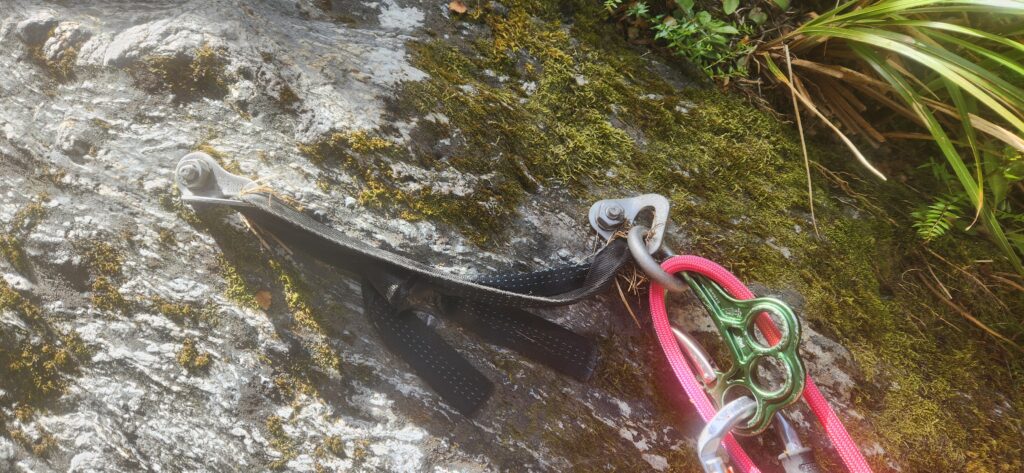
Here’s an example of poorly tied webbing:

Whats wrong? Webbing isn’t tight, it isn’t through the lower ring, knot tail isn’t padding the anchor. The load is entirely on the lower ring bolt.. If it failed, it would slip until the webbing came tight, shock loading the anchor. Brand new webbing would fail around 8kN. This old webbing, less than 8kN.
Overall, this anchor is probably only as good as a single bolt. If the ring bolt had a terrible placement or bad corrosion and failed easily, the top bolt would be worth less than 8kN.
Considering you weigh about 1kN and bad absieling can generate up to 2kN, you probably won’t die… But why not stack the odds in your favour by creating a super strong anchor?

